
Debian 13 “Trixie” is out now. Installing Debian 13 means you are getting the pure Linux experience with maximum control, legendary stability, and the deep satisfaction of knowing exactly what’s running on your machine.
In this guide, we will cover how to install Debian 13 step by step with screenshots.
Prerequisite
You will need:
- The Right ISO: Go straight to the official Debian website. You will see a few download options on the download page. For most modern desktops/laptops, you want the “amd64” netinst image (around 800MB). It’s smaller and grabs the latest software from the internet during install, which usually means fewer updates right after you’re done. You can download the larger, complete installation image for installation on machines without an internet connection.

- A USB Stick: Anything 4GB or larger will work perfectly. Use something reliable as cheap drives can cause weird errors. Erase it completely as we are making a bootable drive.
- The Tool to Make it Bootable: You need to put that ISO file onto the USB stick in a way your computer can boot from. Balena Etcher is almost foolproof and works on any system.

Rufus is also great, especially on Windows.

Download and install any one of the tools. Then, plug the USB stick into your PC and flash the downloaded ISO onto the USB drive.
- Back Up Your Stuff: Whether you’re going all-in on Debian or trying to dual-boot, please back up your important files. It saves you in case something goes wrong. I’ve learned this the hard way, and it’s a lesson you don’t want to learn yourself.
- Power & Patience: Plug your laptop in. An install shouldn’t take hours, but interruptions are catastrophic.
Installing Debian 13
Refer the following steps to install Debian 13 step-by-step.
1) Booting Up
Plug in your USB drive and restart your computer. You might need to tap a key like F12, F2, Esc, or Delete as it boots up to get into the boot menu (where you tell it to start from the USB instead of the hard drive). Check your PC/laptop manual if unsure. It’s usually hinted at on the initial splash screen (“Press F12 for boot menu“).

Find your USB drive in the boot menu. It might be listed under “Removable Devices,” “USB HDD,” or just the brand name of your stick. Select it and press Enter.
2) Choose Graphical Install Option
You will see a menu with a few options. “Graphical install” is a solid choice. It gives you a nice point-and-click interface without being too resource-heavy. “Install” (not “Graphical Install”) is selected if more control and more of a text-like UI is preferred.

3) Choose Your Language, Location and Keyboard Layout
You will choose your language, location, and keyboard. This seems straightforward, but your choices here do matter later for things like date formats and time zones, so take a quick second to get it right.

Click Continue, in the next screen choose your location.

Click Continue and the select your keyboard layout.

Click Continue
4) Configure Network, Hostname and Domain Name
If your system is already connected to the network then installer will try to get the IP from the DHCP server and will configure the networking automatically. In my case, my system is connected to home modem. In the scenario where DHCP server is not detected, in that case you will get option to configure networking manually.

Next, give your computer a name (hostname) that feels cool to you. Keep it simple and meaningful. It may contain letters, numbers, and hyphens/underscores but no spaces and weird symbols. The domain part can usually be skipped unless you are on a corporate network or running your own server.

Next, set the domain name as per your liking. Providing domain name here is optional, you can configure it later if needed after the installation. You can leave blank as it is.

Click Continue
5) Set Root Password and Create Local User Account
Here’s where you set the root password. This is the master key to the entire system, so make it a good one. Write it down and store it somewhere safe.

Then, create your main or local user account. Give it a username (like jane or alex) or something you like to call yourself.

Give it a strong password. This is the account you will actually use day-to-day. Using sudo from this account is how you will do admin tasks, which is much safer than always being logged in as root.

click Continue
6) Disk Partitioning Scheme
The installer gives you a few choices for partitioning your disk. If you plan to install Debian on the entire drive, the “Guided – use entire disk” option is perfectly safe and easy.
(Tip – Thinking of keeping Windows around? Then you absolutely need to choose Manual. You will have to shrink your existing Windows partition first to make free space. It can feel a little risky, but as long as you backed up your data, you will be okay. Just go slow and double-check which partition is which.)

Select your preferred hard drive (e.g., /dev/nvme0n1 for SSDs, /dev/sda for older drives). Double-check you are not picking your USB stick!
Choose “All files in one partition” (simplest) or “Separate /home partition” (my strong recommendation). Why separate /home? Your personal files (documents, pictures, configs) live in /home. If you ever need to reinstall Debian (or try a different distro), having /home on its own partition means your files stay safe. You just reinstalled the system parts. Huge peace of mind.

Click Continue and then choose “Finish Partitioning and write changes to disk” in the following screen.

In the next screen, confirm the changes! (Choose Yes), this erases the drive. Make very sure it’s the correct one. Take a breath, then confirm.

Click on Continue to proceed further and installer will start base system Installation as shown below:

7) Setup Software Package Manager
Choose No to skip “Scan extra installation media”

Click Continue,
Next you will be prompted to configure network mirror, Choose Yes and click Continue.

Click Continue and then installer prompt you to choose nearby mirror based on your country location.

Installer will pull the list of mirrors. Pick one geographically close to you for faster downloads. The installer usually guesses well, but you can choose manually (e.g., ftp.us.debian.org if you are in the US).

Click on Continue
In the following screen, specify proxy server details if your system is behind the http proxy, if it is not then leave it blank.

Click Continue and installer will configure the package manager for you as shown below:

Next, Choose NO to skip participate in the package usage survey.

8) Software Package Selection
Want a desktop with icons and a start menu? Tick Debian desktop environment (GNOME) or maybe KDE Plasma or Xfce for something different.

If you are setting up a server, tick the web server or print server. Or, if you are like me and prefer a bare-bones system to build on exactly what you want, uncheck this. You can always install packages later. For most new users, picking one desktop environment is the way to go.
Once you click on Continue, installer will start to install above selected software.

During the installation, installer will prompt you to install Grub Boot loader, Choose Yes,

Click Continue and then select the disk where installer will install the Grub boot loader.

Click Continue to proceed with the installation.
Once the installation is completed, installer will prompt you to reboot the system as shown below:

Click on Continue to reboot your system.
Note: Don’t forget to remove the installation media from your system.
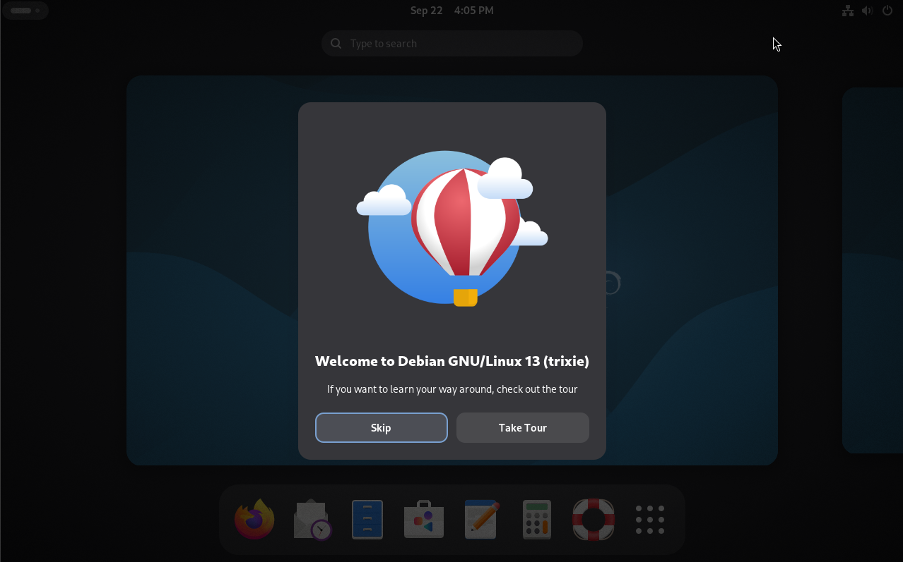
9) Welcome to Your New Base System
When the system is back online after reboot, we will get the following grub loader screen .Choose the first option “Debian GNU/Linux” and hit enter.

This will take us the following screen,
Log in: Type your username (the one you created, not root) and press Enter. Then type your user password and press Enter. (You won’t see *** as you type – it’s security).

Update Immediately: Open a terminal. Make sure you sure connected to the internet and paste this into get everything up to date:
sudo apt update && sudo apt upgrade

It’s like giving your new OS a quick refresh.
You have successfully installed and updated Debian 13 on your PC. Now you can install what you need. Debian famously ships with only free software. It’s a personal choice. Some folks stick to purely free software, but most of us end up adding more for convenience. Make it yours. Change the wallpaper, rearrange the dock, try a new theme. The point of all this is to end up with a computer that works exactly how you want it to. I strongly suggest for customizing Debian after installation.
Also Read: Top 10 Things To Do After Installing Debian 13
Source link